Creating a simple form with Tailwind and Next.js
by Kartik Chaturvedi
This tutorial is the second in a two-part series on custom forms with server-side APIs and third-party services.
There is always something special about custom UI. Yes, it is easy to integrate some default styles together and make a working website, but why not present a unique experience for users when it is now easier than ever? So let’s get started!
Set up
Let’s start up our Next.js project for local development:
npm run dev
Visit localhost:3000 to see the default page generated from the Home component in index.js.
We will be using Tailwind CSS to help create our form. Let’s install it into our Next.js project.
npm i tailwindcss
Create a styles.css file in the root, and add the following Tailwind imports:
@tailwind base;
@tailwind components;
@tailwind utilities;
Thanks to the versatility and utility of Tailwind, that is all the CSS we will need! Pretty cool, right? Now let’s just build Tailwind so we can give it a spin.
npx tailwindcss build styles.css -o output.css
This will create an unoptimized, un-minified file named output.css with all of Tailwind’s styles and utilities so we can use them in our app.
NOTE: This is definitely not the way to build for production. If you are planning to deploy this app, you should configure Tailwind for production.
In /pages, create a file named _app.js and import our newly built CSS file. This will override the default app component Next.js uses.
import '../output.css'

// This default export is required in a new `pages/_app.js` file.
export default function MyApp({ Component, pageProps }) {
  return <Component {...pageProps} />
}
Design the form
Let’s remove the boilerplate code in index.js, and add a basic HTML form. We’ll use a function component (formerly known as stateless components) because we will need to managed a state in the next step using React Hooks.
const Home = () => {
  return (
    <div className='p-8 justify-center items-center h-screen flex'>
      <form className='flex'>
        <input className='bg-gray-200 shadow-inner rounded-l p-2 flex-1' id='email' type='email' aria-label='email address' placeholder='Enter your email address' />
        <button className='bg-blue-600 hover:bg-blue-700 duration-300 text-white shadow p-2 rounded-r' type='submit'>
          Sign Up
        </button>
      </form>
    </div>
  )
}

export default Home
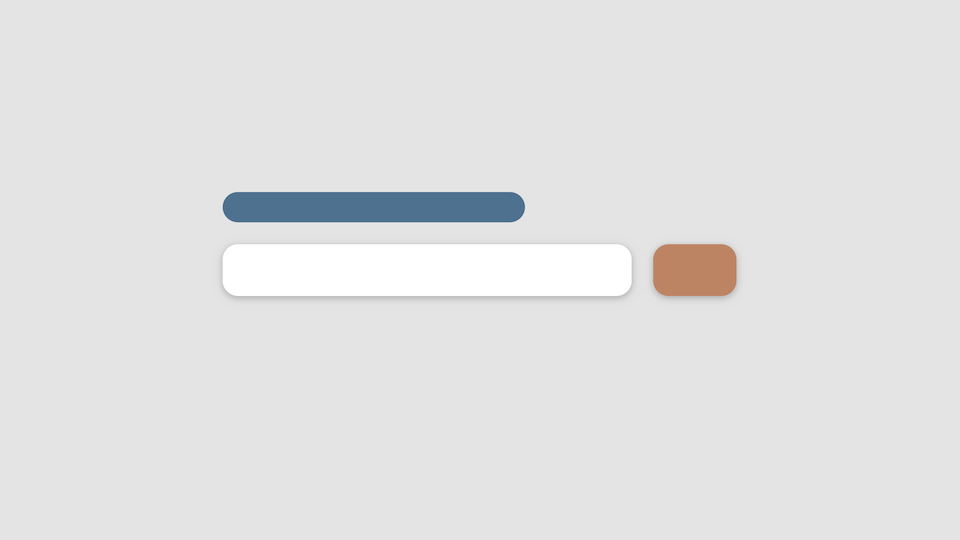
Save and the browser and you should see something like this:
As you can see, Tailwind is very descriptive. Each class we add is a specific style. This may seem daunting and messy at first, but it makes making custom interfaces extremely easy. Need a different hover color? Prefix the color style with hover:. Need rounded corners? Add rounded. Feel free to customize the classes and refer to the detailed docs for more options.
Now let’s make our form more useful.
Create a function inside our Home component that will be called when the Submit button is clicked. Let’s add an alert so we can test our function.
const Home = () => {
  const subscribe = async (e) => {
    e.preventDefault() // prevents page reload
    alert("You have subscribed!")
  }

  return (
    // ...
  )
}

export default Home
Set the onClick attribute on the button to invoke the subscribe function.
<button className='bg-blue-600 hover:bg-blue-700 duration-300 text-white shadow p-2 rounded-r'
  type='submit'
  onClick={subscribe}
>
  Sign Up
</button>
Now clicking the button will cause an alert to appear saying we have subscribed. Cool!
Make it interactive
Next, let’s wire up the text field. We will use the useState React Hook to grab the value that the user enters in the text field. This will let us maintain state in a function component without having to use a React class component.
Import useStateand declare the state variable and the function that will change it.
import { useState } from 'react'

const Home = () => {
  const [input, setInput] = useState('')

  // const subscribe = ...
}
All we pass the useState Hook is our initial state value, which will be an empty string, since we want an empty text field to start with. useState returns a pair of values which we destructure into two separate variables – the state value (in this case input), and the function to update the value (in this case setInput). This is what makes Hooks so easy — anytime we want to access the state, we use the variable. Likewise, anytime we want to update the state, we use the function, just as we would use setState in a React class component.
To capture the value in our text field, let’s add two attributes to the element. The first is value, which stores the entered text, and the second is onChange, which will be triggered every time the value changes. Together, these attributes will keep the text field in sync with the state.
<input className='form-control mr-2'
  type='text'
  placeholder='Email Address'
  value={input}
  onChange={e => setInput(e.target.value)}
/>
Inside of onChange, we set the state variable to whatever the value is changed to, every time the value is changed. We set value to input, so it is always in sync with the state variable. This forms a feedback loop and ensures we always store the latest value to the state, and then display only the latest state.
Finally, we are ready to see everything in action. Modify the subscribe function so that we show an alert with the input state value instead of the message we set earlier:
import { useState } from 'react'

const Home = () => {
  const [input, setInput] = useState('')

  const subscribe = async (e) => {
    e.preventDefault()
    alert(input)
  }

  return (
	  // ...
  )
}
Type something in the field and hit Submit to see the text field value shown in the alert!
The only thing missing now is to call our subscribe API from the previous part of this tutorial.
Just like in the subscribe API, let’s set up a try-catch block and call fetch and get the response in a variable.
const subscribe = async (e) => {
  e.preventDefault()
  try {
    const res = await fetch('./api/subscribe', {
      method: 'post',
      headers: {
        'Content-Type': 'application/json'
      },
      body: JSON.stringify({
        emailAddress: input
      })
    })
  } catch(err) { }
}
A few things to remember:
- We can use the relative path to the
subscribe.jsfile, which is in theapifolder. - The input value is stored in the
inputstate variable. - The
emailAddressvariable name in the body is the same name that oursubscribeAPI is expecting. Changing it means it needs to be changed in both places.
At last, check the res variable for the response so we can show the appropriate response to the user:
const subscribe = async (e) => {
  e.preventDefault()
  try {
    const res = await fetch('./api/subscribe', {
      method: 'post',
      headers: {
        'Content-Type': 'application/json'
      },
      body: JSON.stringify({
        emailAddress: input
      })
    })

    if (res.status === 200) {
      alert('You are subscribed!')
    } else {
      alert('Sorry, something went wrong.')
    }
  } catch(err) {
    alert('Sorry, something went wrong.')
  }
}
With that, we are done! You should now be able to enter an email address in the text field and see it appear in MailChimp instantly.
import { useState } from 'react'

const Home = () => {
  const [input, setInput] = useState('')

  const subscribe = async (e) => {
    e.preventDefault()
    try {
      const res = await fetch('./api/subscribe', {
        method: 'post',
        headers: {
          'Content-Type': 'application/json'
        },
        body: JSON.stringify({
          emailAddress: input
        })
      })

      if (res.status === 200) {
        alert('You are subscribed!')
      } else {
        alert('Sorry, something went wrong.')
      }
    } catch(err) {
      alert(err)
    }
  }

  return (
    <div className='p-8 justify-center items-center h-screen flex'>
      <form className='flex'>
        <input className='bg-gray-200 shadow-inner rounded-l p-2 flex-1' id='email' type='email' aria-label='email address' placeholder='Enter your email address' value={input} onChange={e => setInput(e.target.value)} />
        <button className='bg-blue-600 hover:bg-blue-700 duration-300 text-white shadow p-2 rounded-r' type='submit' onClick={subscribe}>
          Sign Up
        </button>
      </form>
    </div>
  )
}

export default Home
Of course, there are many ways to improve this app. Currently, if a subscriber tries to sign up again, the MailChimp API returns an error indicating the email address already exists — to get around this, we have to parse through the res object for the error code and handle it accordingly. I leave that to you as a challenge!
Some more ideas to improve the app — We could show a success or error message instead of using popups. We could even show a loading animation instead of the button while waiting for the server’s response. I hope to cover these extra improvements in a future tutorial — let me know what you would like to see most!
Until next time, keep innovating!
Kartik's Newsletter
Subscribe to get science and tech news, new posts, and the latest updates from me.